Guides/Parts & specs·7 min read·Updated September 4, 2026
Before you order a kit, decide how your house will be divided into lighting zones. Good zone planning is what lets you run warm white on the porch and a Canada Day red-and-white scheme on the peak at the same time.
Key takeaways
- 1A zone is a physical section of soffit or fascia you want to control independently, such as the front elevation, the garage, or the backyard.
- 2A segment is the software definition of that zone inside the WLED controller, and one controller can hold many segments.
- 3Zones should follow how the house is actually viewed from the street or yard, not just how the track happens to run.
- 4Every zone still needs to respect the same power and data planning as the run as a whole, including power injection past roughly 120 pucks per feed and a data amplifier past 150-200 pucks.
- 5Our 100 ft kit ships with 155 lights across 31 strands, which is enough to plan three or four zones on a typical single-storey home; larger elevations should look at our 150-250 ft kits.
One of the most common mistakes we see in DIY permanent lighting layouts has nothing to do with wiring or track and everything to do with planning. Homeowners buy a kit sized for their linear footage, install it as one continuous run, and then discover on the first holiday or the first football Saturday that they cannot make the garage door red while the rest of the house stays white. The fix is not more hardware. It is zone planning, done before a single piece of track goes up. This guide walks through how to think about zones and segments so your finished system actually does what you pictured when you bought it.
What a zone actually is
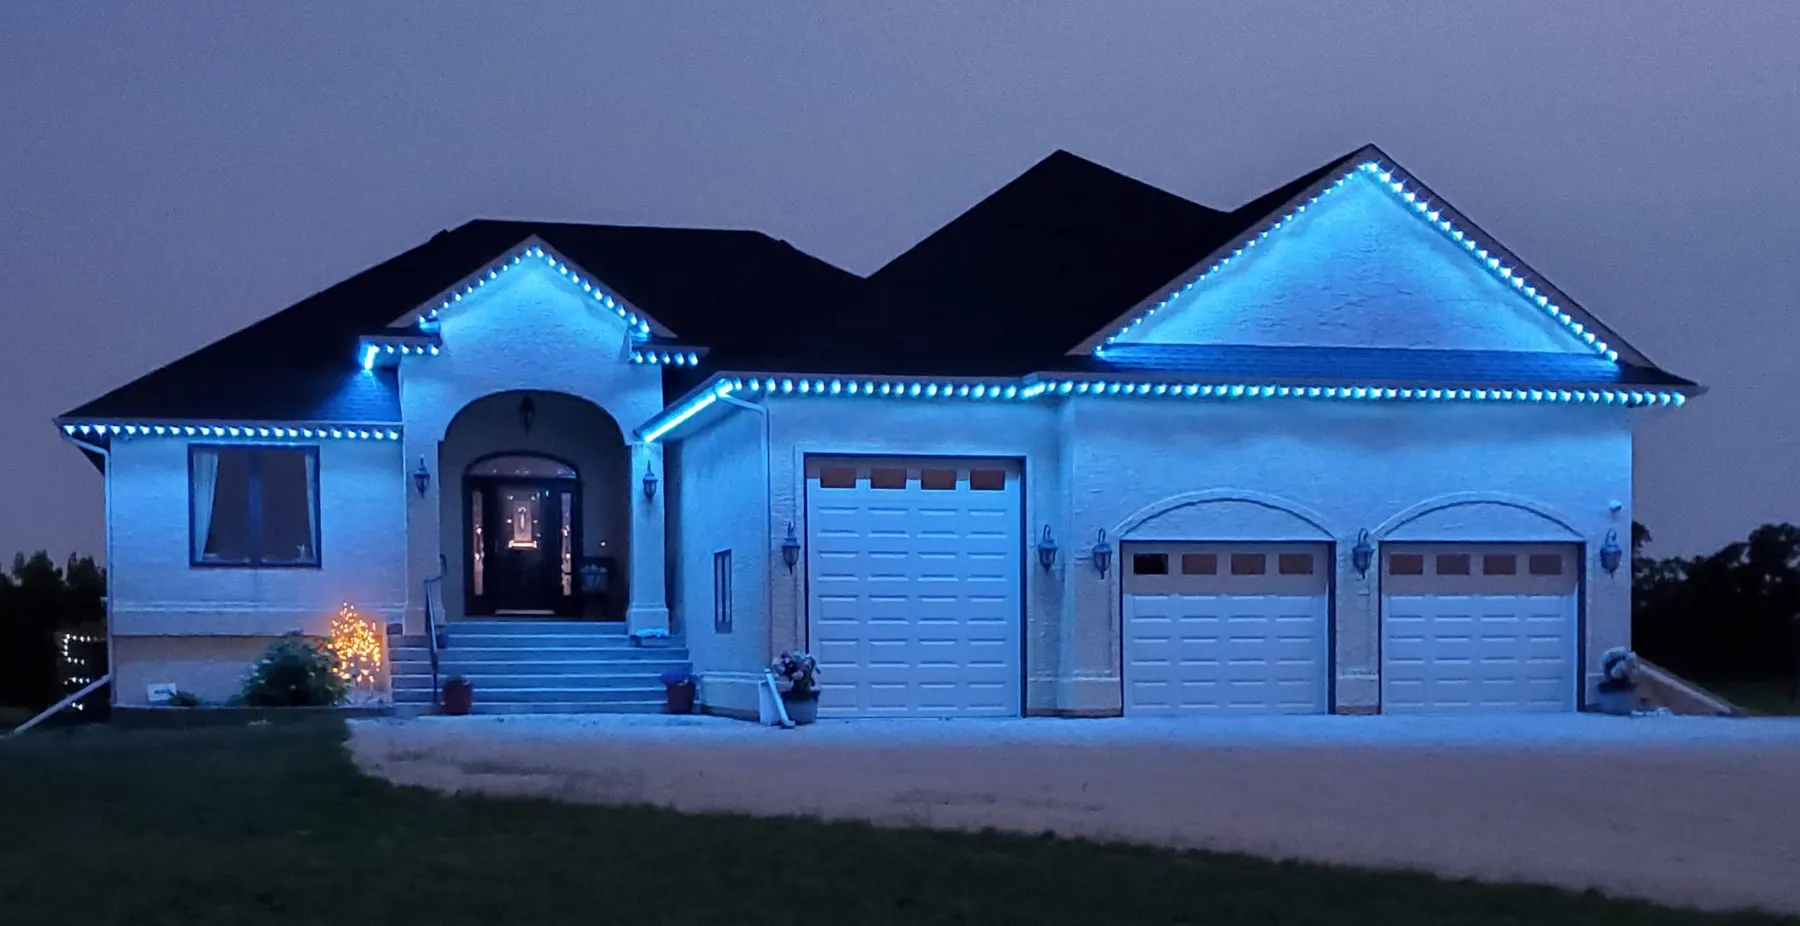
A zone is simply a section of your house that you want to light and control as its own unit. Most homes naturally break into zones already: the front elevation facing the street, the garage, a side elevation, a back patio or deck area, and sometimes a peak or gable that sits higher and reads differently from the rest of the roofline. If you can point at a section of soffit and say "I want that part to do its own thing sometimes," that section is a zone.
Zones are a planning concept first and a wiring concept second. You decide the zones by walking your property and looking at how it is actually seen, not by looking at a stack of aluminum track and deciding where it happens to end.
What a segment is, and how it differs from a zone
Once you know your zones, a segment is how that zone gets defined inside the WLED WiFi controller software. WLED lets you assign a contiguous range of pucks in the string to a named segment, and each segment can run its own colour, its own effect, and its own brightness independently of every other segment on the same controller. In practice this means the physical zone you decided on the walk-around becomes a segment you draw in the WLED app or web interface, matched to the actual puck numbers in that section of the run.
The distinction matters because a single controller can hold several segments, and several zones can live on one controller as long as the puck count and power budget allow for it. You do not necessarily need a separate controller per zone. You need a controller with enough output capacity, planned power injection, and a segment map that matches your physical layout.
Common zone layouts for a typical home
Most Southwestern Ontario homes we install for settle into one of a handful of patterns. None of these are rules, but they are a useful starting point if you are staring at a blank page.
- Front elevation as one zone, garage as a second zone. This is the simplest split and lets you run a garage door accent colour independently of the rest of the front, which is popular for game days and holidays.
- Front, side, and back as three zones. Useful on corner lots or homes where the side elevation is visible from a driveway or neighbouring yard and deserves its own scene.
- Peak or gable as its own zone. A raised gable that catches more light or sits at a different roofline height often looks better lit slightly differently from the lower soffit line, especially at dusk.
- Patio or deck as a separate zone from the house. If you spend evenings on a back deck, treating that stretch as its own zone means you can dial in ambient warm white for entertaining without touching the front of the house.
- Whole-house single zone. Perfectly valid if you mainly want one consistent look and are not planning to run different colours in different areas at the same time.
How zone count interacts with power and data
Dividing the house into zones does not change the underlying electrical planning, and this is where a lot of self-designed layouts go wrong. Each 12V puck draws a small, known load, and a run still needs power injection at roughly every 120 pucks per feed and a data amplifier at roughly every 150-200 pucks, regardless of how many WLED segments you have drawn on top of that physical string. Zones are a software boundary. Power injection points and amplifiers are physical boundaries. You need to plan both, and they do not have to line up with each other.
In practice, this means a zone boundary is often a convenient place to also put a power-injection or amplifier point, since you are already breaking the run there conceptually, but it is not a requirement. A single zone can span multiple injection points if it is long enough, and a single injection point can sit in the middle of a zone rather than at its edge.
Sizing a kit around your zone plan
Once you know your total zones and roughly how many linear feet each one covers, add them up to get your total run length, then choose the kit that covers it with a little headroom. Our 100 ft kit includes 155 lights across 31 strands of five pucks each, a WLED WiFi controller, two 150W power supplies, and the connectors, injection cables and amplifier needed for a run that size, which comfortably supports three or four zones on a typical single-storey home. Larger properties, wraparound porches, or homes that want five or more independent zones should look at the 150 ft, 200 ft or 250 ft kits, which scale the puck count, power supply capacity and connector kit accordingly.
Naming and mapping segments in WLED
When you set up segments in the WLED app, give each one a name that matches how you actually think about the house: Front, Garage, Peak, Patio, rather than Segment 1, Segment 2. This sounds like a small thing, but it is what makes presets and schedules usable months later when you are trying to remember which segment number was the garage. Once your segments are named and mapped to the correct puck ranges, WLED presets let you save a full scene across every zone with one tap, and scheduling lets each zone turn on or change at its own time, such as a sunset trigger for the front elevation and a slightly later start for a patio zone you only use in the evening.
Working through a zone plan with us
If you would rather not sketch zones from scratch, our team can walk your property with you and mark up a zone and segment plan as part of a professional installation quote, matched to the correct kit size and controller layout for what you actually want to control. Homeowners taking the DIY route can still browse pre-sized kits on our DIY kits page (/diy-kits) with the puck and strand counts listed for each length, or pull individual pucks, track, controllers and connectors from the shop page (/shop) to build a custom zone layout piece by piece. And if the zone plan turns out bigger than expected once you have walked the house, our installation page (/installation) covers professional installs across Southwestern Ontario for homeowners who want the zones designed and mounted correctly the first time.
Zone planning for corner lots and multi-elevation homes
Corner lots and homes with more than one visible elevation add a wrinkle worth planning for early. A corner lot is seen from two streets rather than one, which often means the side elevation deserves the same attention as the front rather than being treated as an afterthought fed off the same zone. Walk the property from every angle a neighbour, a passer-by or a guest would actually see it from, not just from the driveway, and treat any elevation that gets meaningful daily exposure as a candidate for its own zone rather than folding it silently into whichever run happens to be nearest.
Homes with a walkout basement, a detached garage, or a separate coach house present a similar decision. If a structure is physically separate from the main house wiring, it may be more practical to run it as its own controller and power supply pairing rather than trying to extend a single controller's segments across a long low-voltage run between buildings. This keeps voltage drop and data-signal length manageable and gives you the option to control the detached structure completely independently, including on a different schedule than the main house.
Presets, schedules and how zones get used day to day
The payoff for careful zone planning shows up every single evening once the system is running, not just on holidays. A well-planned zone map lets you build a small library of WLED presets, saved combinations of colour and effect across every zone at once, so a single tap can switch the whole house from a warm white everyday look to a specific holiday palette, a sports-team colour scheme for game night, or a slow colour-cycle for a backyard party, without manually adjusting each section by hand. Scheduling then layers on top of presets: a sunset trigger can bring the front elevation up automatically every evening, while a patio zone stays off until you turn it on manually for an evening outside, and a garage zone can follow its own separate schedule if it faces a busier street and benefits from staying lit later.
This is really the argument for planning zones properly in the first place. Any system, planned or not, can display a colour. What zone planning buys you is the ability to display different things in different places at different times without touching a single wire after installation day, and that flexibility is only as good as the segment map it was built on.
A short planning checklist before you order
- Walk the exterior and mark every section you would ever want lit or coloured independently.
- Measure the linear footage of each zone and add them for a total run length.
- Check that total against kit sizing, including some headroom for corners and returns.
- Note where power injection and amplifier points will naturally fall based on puck count, not just zone edges.
- Decide on segment names now so the WLED setup step goes quickly once the track is mounted.
Frequently asked questions
What is the difference between a zone and a segment in permanent LED lighting?
A zone is the physical section of your house you want to control independently, such as the garage or the front elevation. A segment is how that zone is defined inside the WLED controller software, mapped to a specific range of pucks in the run. You plan zones by walking the property, then translate them into segments during setup.
How many zones can one WLED controller handle?
A single WLED controller can hold multiple segments, so several zones can live on one controller as long as the total puck count and power budget for that controller are respected. Larger homes with many zones or a high total puck count may use more than one controller and power supply pairing.
Do zone boundaries need to line up with power injection points?
No. Power injection is based on puck count along the physical run, roughly every 120 pucks per feed, while zones are a software boundary defined in WLED. They often end up near each other because a zone edge is a convenient place to break the run, but there is no requirement that they match.
How many zones can a 100 ft kit support?
Our 100 ft kit includes 155 lights across 31 strands and comfortably supports three or four independent zones on a typical single-storey home, such as front, garage, and a side or peak section. Homes wanting five or more zones, or larger elevations, should look at our 150-250 ft kits.
Should I plan zones before or after choosing a kit size?
Plan zones first. Walk the house, mark the sections you want to control independently, and measure the total linear footage across all of them before choosing a kit. It is much easier to size a kit and controller layout to a finished zone plan than to try to carve zones out of a run that was installed as one continuous string.
Can I rename or change my zones after installation?
Yes. Segment definitions inside WLED can be edited at any time without touching the physical track, so you can rename, resize, or reassign zones as your preferences change, as long as the new segment boundaries still fall within the pucks that are physically wired and powered together.
Kit or installed
Everything in this guide ships from London, Ontario.
Complete 12V soffit track kits from $1,265, every part sold separately, and professional installation across Southwestern Ontario.
Keep reading
Parts & specs · 8 min
Wiring Layouts for Permanent Lights: Single Run, T-Branch and Multi-Zone
Not every roofline wants the same wiring layout. A single run, a T-branch off a corner, and a multi-zone layout with several independent segments all use the same 12V parts, just arranged differently. Here is how to choose and lay one out.
Parts & specs · 7 min
What Is Power Injection (and When Do You Need It)?
Long runs of permanent LED soffit lighting can dim and shift colour toward the far end. Power injection fixes it. Here is what it is, why voltage drop causes it, and roughly at what footage it starts to matter.
Parts & specs · 7 min
Choosing an LED Power Supply: 60W vs 150W vs 300W
A plain-English guide to sizing the power supply for a permanent LED track lighting run — how watts relate to linear feet, why headroom matters, and when a big home needs two supplies plus power injection.