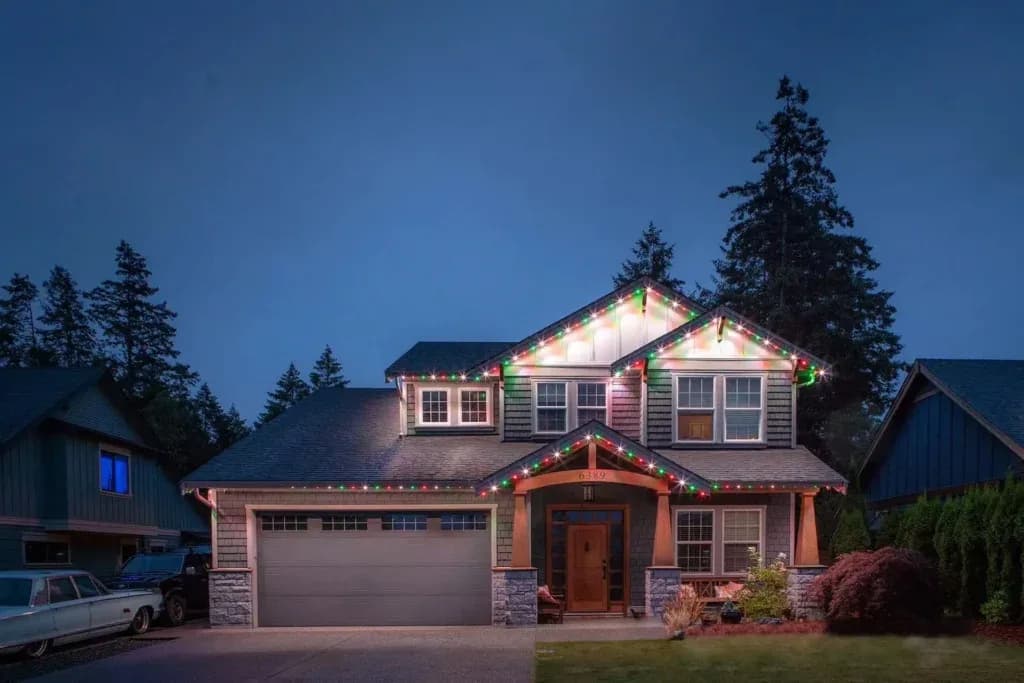
Guides/How-to·9 min read·Updated August 28, 2026
A practical, no-hype DIY guide to installing permanent LED soffit track lights on your own home, from measuring the roofline to pairing the app and saving your first scenes.
Key takeaways
- 1A typical single-storey front elevation (roughly 50-100 ft) is a realistic one-weekend DIY project for a confident homeowner comfortable on a ladder.
- 2Measure your full roofline first, then buy a kit sized to that length; runs over about 100 ft usually need power injection to keep brightness even end to end.
- 3The aluminum track mounts under the soffit or along the fascia, the RGBW pucks clip into it, and everything terminates at a low-voltage 12V power supply plugged into a standard outlet.
- 4You never work with mains voltage inside the track itself; the whole light run is safe 12V DC, which makes this far more DIY-friendly than hardwired accent lighting.
- 5Southwestern Ontario homeowners who would rather not climb a ladder can book professional installation instead of running the track themselves.
Permanent soffit track lights give you year-round accent lighting and full-colour holiday displays without ever climbing a ladder again once they are in. The good news for handy homeowners is that installing them yourself is genuinely achievable. The entire light run operates on safe 12V DC, the aluminum track and RGBW pucks are designed to clip together without soldering, and the only mains-voltage connection is the power supply plugging into an existing outlet. This guide walks through the real steps, the tools and Illumi parts you need, a time estimate, and the safety points that actually matter.
Before you start: is this a DIY job for you?
The install itself is not complicated, but it does involve working at height along your roofline. If you are comfortable and steady on an extension ladder, can run a tape measure along your soffit, and can strip and connect a low-voltage wire, you can do this. If ladder work at two storeys makes you uneasy, or your soffit is high, steep, or hard to reach, that is exactly the situation where hiring it out makes sense. We now offer professional installation across London, Woodstock, and the Kitchener-Waterloo region, so local readers have that option.
Tools you will need
- Extension ladder (rated for your working height) plus a ladder stabiliser if you have one
- Tape measure (a 100 ft reel tape makes measuring the roofline much faster)
- Cordless drill or impact driver with a hex/nut driver bit
- Wire strippers and a small pair of flush cutters
- Hacksaw or aluminum-cutting mitre blade to trim track to length
- Pencil and painter's tape for marking mounting points
- A helper on the ground (strongly recommended for anything above single storey)
The Illumi parts you need
The simplest path is a complete LED Housing Package DIY kit sized to your roofline. Each kit bundles the aluminum track, 12V RGBW pucks, a WiFi 4-channel controller, the right power supply, connectors, and soffit screws so you are not guessing at part counts. Kits come in 50 to 200 linear-foot lengths.
- Complete DIY kit sized to your measured length, from the DIY kits page (/diy-kits) - the recommended starting point
- Aluminum track in the soffit colour closest to your fascia (four colours available) if you are buying parts individually from the shop (/shop)
- 12V RGBW pucks (the light modules that clip into the track)
- WiFi 4-channel controller to run scenes and colours from your phone
- Power supply sized to your run: 60W for short runs up to roughly 150-200W or 300W for longer elevations - the kit picks this for you
- Power-injection cable and a second power supply or amplifier if your total run exceeds about 100 ft (see the planning step below)
- Corner and straight connectors, plus stainless soffit screws
Step-by-step installation
- 1
Plan and measure the roofline
Walk the elevations you want lit and measure each straight soffit or fascia run with a tape. Add the segments together for your total linear footage, and note every inside and outside corner - you will need a connector at each one. Round up when choosing a kit; it is much easier to trim excess track than to come up short.
- 2
Check whether you need power injection
LEDs dim gradually over a long run as voltage drops along the wire. As a rule of thumb, runs under about 100 ft are fine fed from one end. For longer elevations, plan to inject power at the far end or the midpoint using a power-injection cable so brightness stays even from corner to corner. If your total is well over 100 ft, budget for a second power supply or an amplifier.
- 3
Gather your kit and dry-fit on the ground
Lay out the track and pucks along your driveway first. Confirm the pucks clip firmly into the channel, test-fit your corner connectors, and cut the track to your measured segment lengths with a hacksaw. Doing this at ground level means less time on the ladder.
- 4
Mount the aluminum track under the soffit or along the fascia
Set your ladder safely, hold the first track section against the underside of the soffit (or the face of the fascia, whichever look you prefer), and drive the supplied soffit screws through the track's mounting holes into solid material. Keep the channel opening pointed down and out so the light washes the wall. Work one section at a time, joining sections with straight connectors and turning corners with corner connectors.
- 5
Run and connect the RGBW track
With the track mounted, seat the RGBW pucks into the channel along each run and snap the low-voltage connectors between sections. Keep the polarity consistent - the connectors are keyed, so they only seat one way. At corners, use the corner connector rather than forcing the rigid track around the bend.
- 6
Wire the controller and power supply
Route the end of your light run to a convenient spot near an exterior outlet - many homeowners tuck the controller and power supply into the garage, an eave, or a weatherproof box. Connect the RGBW run to the WiFi 4-channel controller, then connect the controller to the low-voltage output of the power supply. If you planned power injection, connect the injection cable at the far end now.
- 7
Plug in and power up
Only now, with every section mounted and connected, plug the power supply into the outlet. The pucks should light. If a section past a certain point is dark, that connection is not fully seated - unplug, re-seat it, and try again. If the far end looks dimmer than the near end, that is the power-injection cue from step two.
- 8
Pair the app and set your scenes
Open the companion app, put the controller into pairing mode, and add it to your home WiFi (2.4 GHz). From there you can set warm white for everyday curb appeal, save colour scenes for holidays and game days, and schedule on/off times so the lights run themselves.
How long does it take?
For a confident DIYer, a single-storey front elevation of roughly 50 to 100 ft is a realistic one-weekend project - plan on most of a day once you factor in measuring, dry-fitting, and ladder repositioning. A full wrap around a two-storey home, with multiple corners and a couple of power-injection points, is more like two days or a project spread across a few evenings. The mounting is the slow part; the wiring and app pairing take under an hour combined.
Common mistakes to avoid
- Measuring only the front and then coming up short when you decide to wrap the sides - measure every elevation you might ever want lit.
- Skipping power injection on a long run and then wondering why one end looks washed out.
- Mounting the track with the channel facing the wrong way, so the light spills up into the soffit instead of down the wall.
- Forcing rigid track around a corner instead of cutting it and using a corner connector.
- Trying to pair the controller to a 5 GHz WiFi network - these controllers use 2.4 GHz.
Ready to start?
If you are the hands-on type, the fastest way to get going is to measure your roofline and order a complete LED Housing Package kit sized to that length from our DIY kits page (/diy-kits) - it arrives with everything matched and ready to mount. Prefer to build a custom run or add power injection to an existing setup? Grab individual pucks, track, controllers, and power supplies from the shop (/shop). And if you are in London, Woodstock, or the Kitchener-Waterloo area and would rather leave the ladder work to us, book professional installation through our installers page (/installers). Either way, you end up with permanent, app-controlled lighting that handles everyday curb appeal and every holiday for years to come.
Frequently asked questions
How hard is it to install permanent soffit lights yourself?
For a homeowner comfortable on a ladder and able to run a tape measure and connect a low-voltage wire, it is a very approachable DIY project. The entire light run is safe 12V DC with keyed, no-solder connectors, so the only mains-voltage step is plugging the power supply into an existing outlet. The mounting at height is the part that takes patience, not the wiring.
Do I need an electrician to install soffit track lights?
Usually not. The track and pucks run on low-voltage 12V DC and terminate at a plug-in power supply, so no new mains wiring is involved. If you want a dedicated exterior outlet added or the power supply hardwired, that portion should be done by a licensed electrician, but the lights themselves are designed for homeowner installation.
How do I know if I need power injection?
Power injection keeps brightness even on long runs where voltage naturally drops along the wire. As a rule of thumb, runs under about 100 linear feet are fine fed from one end. For longer elevations, plan to feed power at the far end or midpoint with a power-injection cable, and for very long runs add a second power supply or an amplifier. Our kits flag when injection is recommended for the length you choose.
What length of kit do I need?
Measure every soffit or fascia run you want lit, add the segments together, and round up. Illumi kits come in 50 to 200 linear-foot lengths. It is always easier to trim a little excess aluminum track than to run short mid-install, so if you are between sizes, go up.
Can I install these in winter in Canada?
The lights are built for year-round Canadian weather once installed, but the install itself should be done in dry, mild, ice-free conditions for safety on the ladder. Most homeowners install in spring or fall. If you want them up for the holidays without risking icy ladder work, that is a good time to book professional installation instead.
How long do permanent soffit lights last?
Quality 12V RGBW LED pucks are rated for tens of thousands of hours of use, which is many years of daily operation. Because the system is modular, if a single puck or connector ever fails you replace that component rather than the whole run. Illumi backs the system with a 5-year warranty.
Kit or installed
Everything in this guide ships from London, Ontario.
Complete 12V soffit track kits from $1,265, every part sold separately, and professional installation across Southwestern Ontario.
Keep reading
How-to · 8 min
Mounting Lighting Track on Vinyl, Aluminum and Wood Soffits
The aluminum track holding your pucks mounts the same way on every house, but the soffit underneath it does not. Here is how to plan and drill for vinyl, aluminum and wood soffits without cracking, oil-canning or splitting anything.
Guides · 9 min
Permanent Outdoor Lights in Canada: The Complete 2026 Guide
Everything Canadian homeowners need to know about permanent outdoor LED lighting in 2026 - how it works, the three quality tiers, real cost per foot, winter durability, and whether to DIY or hire a pro.
Parts & specs · 8 min
Wiring Layouts for Permanent Lights: Single Run, T-Branch and Multi-Zone
Not every roofline wants the same wiring layout. A single run, a T-branch off a corner, and a multi-zone layout with several independent segments all use the same 12V parts, just arranged differently. Here is how to choose and lay one out.