Guides/How-to·8 min read·Updated September 4, 2026
The aluminum track holding your pucks mounts the same way on every house, but the soffit underneath it does not. Here is how to plan and drill for vinyl, aluminum and wood soffits without cracking, oil-canning or splitting anything.
Key takeaways
- 1The track itself is the same 5-hole aluminum extrusion in every kit; what changes by soffit material is the screw, the pilot hole and how much clearance you leave for movement.
- 2Vinyl soffit needs slightly oversized pilot holes so the panel can expand and contract with temperature without cracking around the screw.
- 3Aluminum soffit is thin and can oil-can (dent or ripple) if you overdrive screws; a light touch and a driver with clutch control matters more than the screw itself.
- 4Wood soffit is the most forgiving material but the most likely to hide rot; always check for firm wood before you commit to a mounting line.
- 5Colour-matched 5/8-inch screws come standard in every Illumi Track Lights kit for black, white, wicker and brown track, so hardware colour is one less decision to make.
Every permanent LED soffit kit lives or dies on how well the track is fastened, and the track itself does not care what kind of house it is on. What changes from one job to the next is the soffit material underneath it. Vinyl, aluminum and wood each behave differently under a screw, and mounting them the same way is the single most common reason a DIY installer ends up with cracked panels, oil-canned aluminum, or a run of track that works loose after one winter. This guide walks through the layout and drilling approach for each material so your track goes up straight, stays put, and does not damage the soffit it is riding on.
Before you drill anything: plan the line
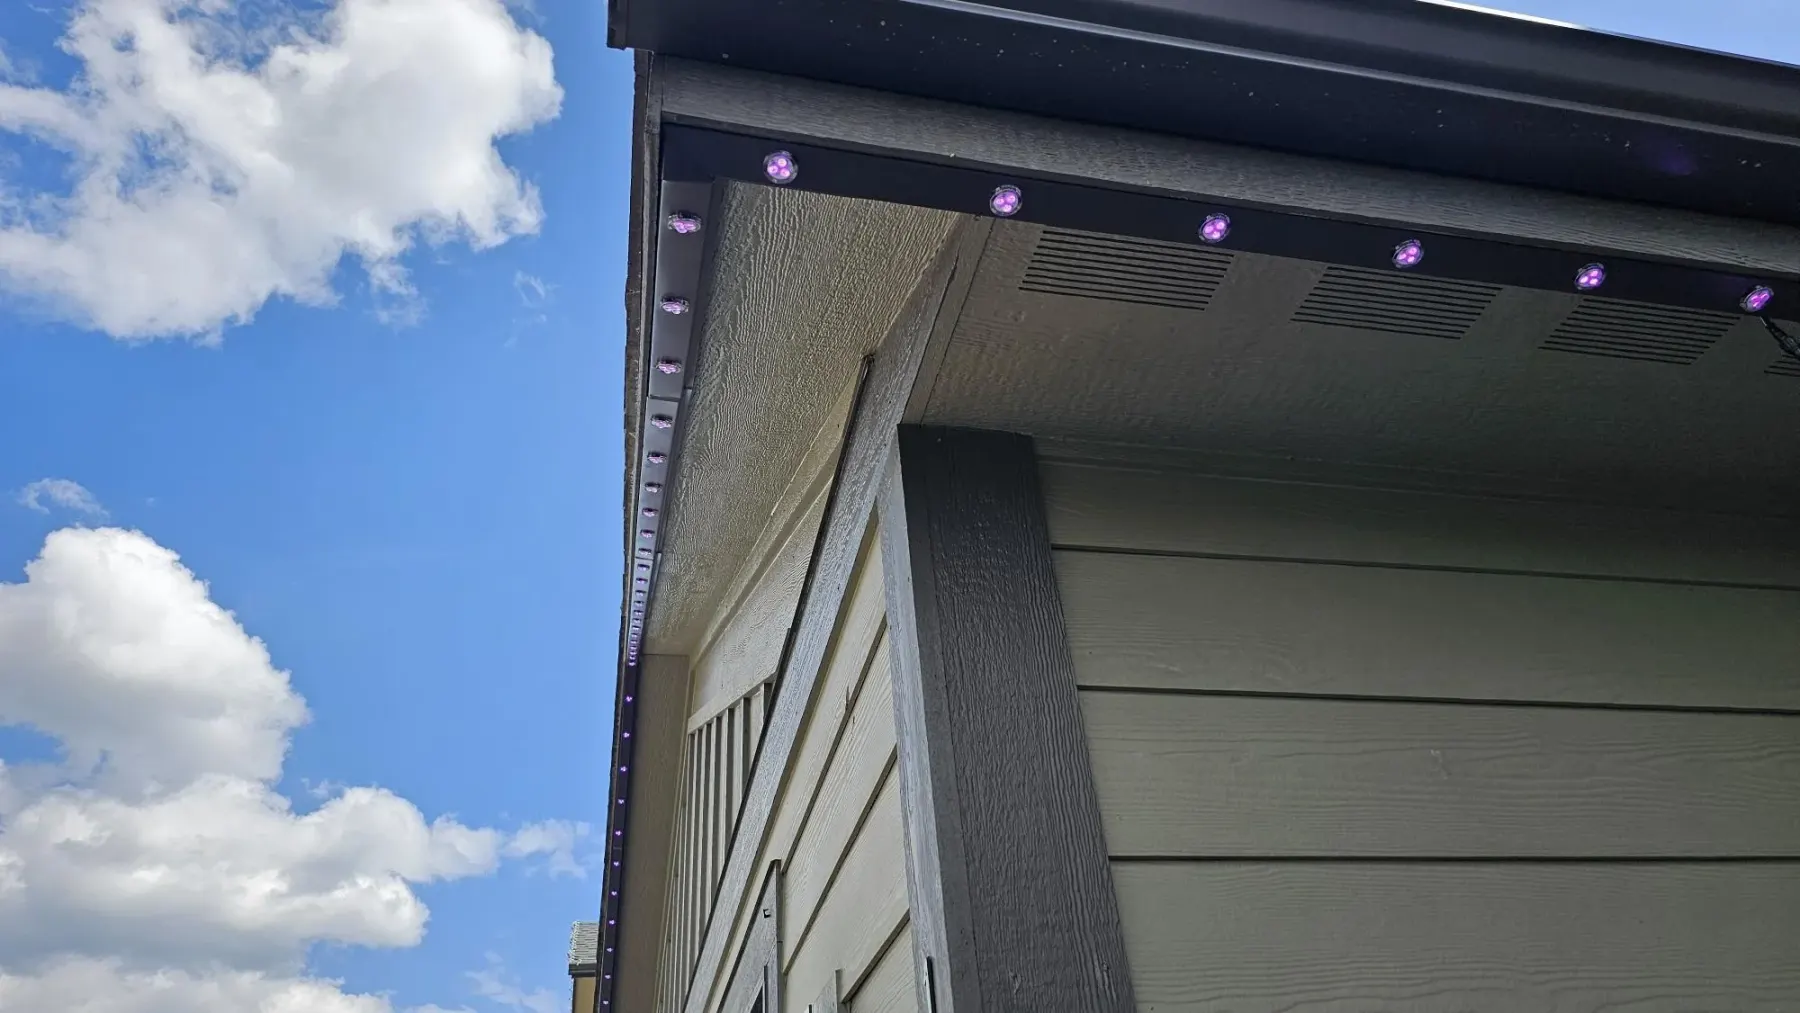
Regardless of material, every mounting job starts the same way. Snap or measure a straight reference line along the underside of the soffit, set back far enough from the fascia and the outer edge that the track sits flush with the roofline when you look up from the ground. Dry-fit a full section of track along that line before you drill a single hole, and check it against corners, vents, and any soffit seams. Track sections join with connectors, so plan your seams to land near a joint or a low-visibility spot rather than in the middle of a long, visible run. This planning step matters more on vinyl and aluminum than wood, because both of those materials are far less forgiving of a second attempt near a botched hole.
Mounting on vinyl soffit
Vinyl soffit is the material most DIY installers are nervous about, and the nervousness is fair; vinyl cracks under stress in a way wood and aluminum do not. But it mounts LED track reliably once you understand its one real quirk: vinyl expands and contracts significantly with temperature, moving more across a hot summer afternoon and a cold winter night than most people expect. A screw driven dead tight into an undersized hole gives the panel nowhere to move, and the stress eventually splits the vinyl around the fastener, sometimes months after installation.
The fix is a pilot hole slightly larger than the screw shank, not the screw thread, so the vinyl can flex without the fastener binding against it. Drive the screw snug against the track but stop short of fully compressing the vinyl panel; the track should sit flat without the vinyl visibly bowing around the screw head. Avoid mounting directly over a vinyl seam or overlap joint, since that spot already carries stress from the panels expanding independently, and never mount into a soffit vent slot, which weakens the material right where you need it strongest.
Signs you are overtightening on vinyl
- The panel visibly dimples or bows inward around the screw head.
- You feel the driver's resistance spike suddenly rather than build gradually.
- Hairline stress lines appear radiating from the hole immediately after driving.
- The screw head sits proud instead of flush, meaning it stripped the vinyl before seating.
Mounting on aluminum soffit
Aluminum soffit panels are thin sheet metal, typically well under a millimetre thick, and that thinness is what makes them prone to oil-canning: a visible ripple or dent that appears when the metal is stressed beyond its limit, usually from a screw driven too fast or too hard. Unlike vinyl, aluminum does not crack; it deforms permanently, and once oil-canned, that ripple is visible in raking light for the life of the soffit. It cannot be undone by backing the screw out.
The practical fix is control, not a different fastener. Use a drill or driver with adjustable clutch settings, start on a low torque setting, and increase only if the screw is not seating. Pilot holes matter here too, sized to the screw shank so the aluminum is not forced to thread its own hole under load. Support the panel from behind where possible, since aluminum soffit is often installed over a hollow cavity, and pressing your other hand flat against the panel near the screw location while driving gives the metal something to push against instead of flexing away.
Mounting on wood soffit
Wood is the most forgiving of the three materials for driving a screw. It takes a fastener predictably, tolerates a range of torque settings, and does not oil-can or crack the way metal and vinyl do. The real risk with wood soffit is not the mounting technique, it is what is hiding underneath the paint: rot. Older homes especially can have soffit boards that look sound from the ground but are soft or spongy where moisture has gotten in around a vent or a roof edge.
Before committing to a mounting line on wood, press a fingertip or the tip of an awl into a few spots along the run. Firm wood resists; rotten wood gives with almost no pressure. If you find soft spots, shift the line to solid wood where possible, and treat any soft area as a repair item before lighting goes anywhere near it, since a screw into rotten wood will not hold and the track will eventually sag or pull free. On sound wood, a standard pilot hole slightly smaller than the screw's minor diameter gives a strong, splinter-free hold without pre-cracking the grain.
- 1
Snap a level reference line
Measure in from the fascia and outer soffit edge so the finished track sits flush with the roofline when viewed from the ground, and mark it the full length of the run.
- 2
Dry-fit the track before drilling
Hold full sections against the line to confirm corners, connector positions and any obstructions like vents before a single hole is made.
- 3
Identify the soffit material at each section
A single house can mix vinyl, aluminum and wood around porches, additions or repairs, so confirm material continuity along the whole run rather than assuming one type throughout.
- 4
Set pilot holes to match the material
Slightly oversized on vinyl for expansion room, sized to the screw shank on aluminum to avoid oil-canning, and slightly undersized on solid wood for grip.
- 5
Test wood soffit for rot before drilling
Press firmly along the line; soft or spongy spots need repair before mounting, not a screw driven into failing material.
- 6
Mount the track using the pre-drilled 5-hole pattern
Drive fasteners snug and flat without over-torquing, checking each screw seats the track tight to the soffit without deforming the panel.
- 7
Check the full run for straightness and flush fit
Sight down the length from one end before installing pucks, and correct any section that has pulled the track out of line.
- 8
Install pucks, connectors and wiring last
Once the track is confirmed solid and straight, snap in the pucks and complete the electrical connections per the kit's layout plan.
Corners, seams and other transition points
Every soffit run eventually hits a corner, an outlet box, a vent, or a seam where two soffit materials meet, such as an older wood-soffit addition tied into a newer vinyl-soffit main house. Track connectors are designed to bridge these transitions without a break in the light line, but the mounting rule at a transition is simple: treat each side of the joint according to its own material. Do not assume that because one side of a corner mounted easily, the other side will behave the same way, especially where wood meets vinyl or a repair patch meets original material.
Track colour and hardware
Every Illumi Track Lights kit ships with colour-matched 5/8-inch soffit screws in black, white, wicker or brown to match the track finish, so the fasteners disappear into the line rather than standing out as bright metal dots along the roofline. Matching hardware is a small detail, but it is the difference between a track line that reads as a clean architectural feature in daylight and one that looks like a visible parts list. The screws are sized for the 5-hole track pattern used across every kit length, from the 50 ft kit up through the 250 ft kit, so the mounting hardware does not change based on how much track you are running.
When to call in a professional install
Most homeowners can mount track themselves once they know which material they are working with, and our DIY kits (/diy-kits) are built around exactly that: a full layout plan, colour-matched hardware and clear instructions for a weekend install. But a few situations are worth handing off. Multi-storey soffits that need ladder work above a second floor, houses where the soffit material is genuinely unclear or mixed with hidden rot, and large commercial or multi-unit buildings are all cases where our crew's professional installation (/installation) across London, Woodstock, Kitchener, Waterloo, Cambridge, Guelph, Stratford and Ingersoll is the safer and often faster route. Whichever path you take, the parts themselves, from track to connectors to screws, are the same components listed on our shop page (/shop), so a DIY start does not lock you out of a professional finish later if the job turns out bigger than expected.
Getting the mounting right the first time is what separates a permanent lighting install that looks factory-clean for years from one that needs re-mounting after the first freeze-thaw cycle. Match your screw and pilot hole approach to the soffit material in front of you, check for hidden rot on wood before you commit a line, and go easy on the driver with aluminum, and the track itself will do the rest.
Frequently asked questions
Can I mount the same LED track on vinyl, aluminum and wood soffit?
Yes, the aluminum track and mounting hardware are identical across soffit materials. What changes is the pilot hole size and driving technique: slightly oversized holes on vinyl for expansion, controlled torque on aluminum to avoid oil-canning, and standard pilot holes on solid wood.
Why does vinyl soffit crack when mounting LED track?
Vinyl expands and contracts with temperature more than other soffit materials. A screw driven into an undersized pilot hole leaves no room for that movement, and the stress eventually splits the panel around the fastener, sometimes months after installation. An oversized pilot hole relative to the screw shank solves it.
What is oil-canning and how do I avoid it on aluminum soffit?
Oil-canning is a permanent ripple or dent in thin aluminum caused by overdriving a screw. Avoid it by using a driver with clutch control set to low torque, sizing the pilot hole to the screw shank, and supporting the panel from behind where the soffit is hollow.
How do I know if my wood soffit is rotten before mounting track?
Press a fingertip or an awl into the wood along your planned mounting line. Firm wood resists; rotten or water-damaged wood gives with almost no pressure. Shift your mounting line to solid wood, and treat soft spots as a repair item before installing anything.
Do your kits include the right screws for my soffit colour?
Yes. Every kit ships with colour-matched 5/8-inch soffit screws in black, white, wicker or brown to match the track finish, so the hardware blends into the line rather than standing out.
Should I mount the track myself or hire a professional installer?
Most single-storey homes with clearly identifiable soffit material are straightforward DIY jobs with one of our kits. Multi-storey ladder work, mixed or unclear soffit material, and larger commercial buildings are better suited to our professional installation crew across London, Woodstock and the Kitchener-Waterloo region.
Kit or installed
Everything in this guide ships from London, Ontario.
Complete 12V soffit track kits from $1,265, every part sold separately, and professional installation across Southwestern Ontario.
Keep reading
How-to · 9 min
How to Install Permanent Soffit Track Lights (Step-by-Step)
A practical, no-hype DIY guide to installing permanent LED soffit track lights on your own home, from measuring the roofline to pairing the app and saving your first scenes.
Guides · 9 min
Permanent Outdoor Lights in Canada: The Complete 2026 Guide
Everything Canadian homeowners need to know about permanent outdoor LED lighting in 2026 - how it works, the three quality tiers, real cost per foot, winter durability, and whether to DIY or hire a pro.
Parts & specs · 8 min
Wiring Layouts for Permanent Lights: Single Run, T-Branch and Multi-Zone
Not every roofline wants the same wiring layout. A single run, a T-branch off a corner, and a multi-zone layout with several independent segments all use the same 12V parts, just arranged differently. Here is how to choose and lay one out.